The Battle
An airborne landing at
Arnhem (the attack was code-named Operation Market Garden) was a
plan to end WWII early. The idea for an airborne landing on Arnhem
came from Field Marshall Montgomery. The heroics that occurred at
Arnhem and the surrounding areas put it up with such events as
Dunkirk, the Battle of Britain, the Battle of the Atlantic and D-Day
in terms of the courage displayed by the men on the ground. However,
some also see the attack on Arnhem as an attack that went a 'bridge
too far'.
Montgomery's plan was
relatively simple. He believed that the most obvious crisis the
Allies would face attacking into Germany was crossing the Rhine.
Intelligence reports had already come in stating that the nearer the
Allies got to the River Rhine, the more fierce the Germans defence
was getting.
Montgomery reckoned on
dropping a large airborne force into Holland which could then serve
a number of purposes. It could mop up German resistance in Holland
but more important, it could attack outflank the defences put up by
the Germans along the Siegfried Line the and then attack German
defences behind the River Rhine and assist an Allied crossing of
that river. While the American general Patton continued to advance
in the south towards Germany, the airborne attack would assist in an
attack in the north of Europe. Both armies would then squeeze what
was left of German resistance in the middle.
'Monty' planned for an
airborne assault to capture five bridges in Holland to secure the
roads that the Allies needed to convey their armoured divisions and
supply vehicles. Two of these bridges were over canals (the Wilhelma
and Zuid Willems Vaart canals) while the other three bridges were
over rivers. These rivers were the Maas where the bridge crossed at
Grave; the Waal where the bridge crossed at Nijmegen and the Neder
Rijn at Arnhem. Here, at Arnhem, the capture of the bridge was vital
as the Neder Rijn was over 100 metres wide at this point.
The plan had its critics
most notably in the American camp who believed that the supplies
needed for the attack would be taken away from their drive towards
the Rhine. Initially, Eisenhower, supreme commander of Allied forces
in the west, called the plan a "pencil-like thrust". General
Bradley, commander of the US 12th Army Group called it a venture "up
a side-alley". However, an event quickly gave Montgomery's plan more
momentum.
V2 rockets had fallen in
London. Quite clearly, these posed a far greater problem to the
British government than the V1's which frequently went off target or
were shot down. The V2's were in a different category. The Allied
knew they were being fired from the coast of northern Europe so any
successful attack into Holland and beyond would greatly ease this
problem until all the launch sites were destroyed. The War Office
gave 'Monty' its backing. Even so, Montgomery found that he could
not get the promise of supplies that he needed for Market Garden. On
September 11th, 1944, Montgomery told Eisenhower that, despite the
support of the War Office, the attack would have to be postponed due
to lack of vital supplies. 'Monty's' tactic worked and Eisenhower
immediately flew his chief-of-staff to Montgomery's headquarters to
see what supplies he needed.
The Allied Airborne Army
comprised of four divisions; two British and two American. Linked to
it was the Polish Independent Parachute Brigade lead by
Major-General Sosabowski. The two most senior American commanders
were Major-General Gavin of the 101st Division and Major-General
Maxwell Taylor of the 82nd Division. Both men were knowledgeable in
airborne warfare. The British First Airborne Division was lead by
Major-General Urquhart. He was an unusual choice to lead the
Airborne Division as he had never parachuted before, never
participated in a glider landing and got air sick. He, himself,
expressed his surprise when he was appointed commander of the
division.
The First Airborne Division
had not taken part in D-Day It had been kept in reserve and had
remained inactive after June 1944. A number of planned operations
had been cancelled at the last minute because they were not needed
due to the success of the British armoured columns on the ground. By
September 1944, the First Division was "restless, frustrated and
ready for anything". Urquhart said that it was:
The First Division was given
the task of capturing the bridge at Arnhem and holding it. The 101st
Division was to capture the Zuid Willems Vaart Canal at Veghel and
the Wilhelmina Canal at Son. The 82nd Division was to capture the
bridges at Grave and at Nijmegen.
The attack had to be planned
in just six days. Urquhart's First Division faced two major
problems; the shortage of aircraft and the belief that the bridge at
Arnhem was surrounded by anti-aircraft guns that would make a
landing by the bridge itself too difficult.
The Americans were given the
priority with regards to aircraft. The capture of the bridge at
Arnhem would be pointless if the Americans failed to captured their
targets. Therefore, the Americans would be carried to their targets
in one lift whereas the attack on Arnhem would be done in three
separate lifts during the day. Any night time landings were
considered too dangerous.
This posed a major problem
for Urquhart. His first force would have the element of surprise
and, if the German resistance was minimal, would hold the bridge and
secure any landing zones for the gliders. However, any subsequent
landings would be after the Germans would have had the time to get
themselves organised.
Intelligence reports also
showed that the flak around the bridge itself was heavy. This was
confirmed by RAF Bomber crews who encountered the flak on their
regular flights into Germany. Urquhart decided to make his landings
to the west away from the bridge even though he knew that this was a
risk. If the German resistance was stronger than anticipated, there
was the chance of the first landing not even getting to Arnhem
Bridge and taking out the flak. British Intelligence reports
indicated that the German presence in Arnhem was minimal. It was
believed that the Germans only had six infantry divisions in the
area with 25 artillery guns and only 20 tanks. German troops, in an
Intelligence report of September 11th, were said to be "disorderly
and dispirited". A similar report was made on September 17th.
However, reports from the
Dutch Resistance indicated otherwise. On September 15th, the Dutch
had informed the British that SS units had been seen in the Arnhem
area. The First Airborne Division was given this information on
September 20th - three days after the attack on the bridge at Arnhem
had begun.
Operation Market Garden
began on Sunday morning, September 17th, 1944. Luftwaffe fighters
bases had been attacked as had German barracks based near the drop
zones. 1,000 American and British fighter planes gave cover as the
gliders and their 'tugs' crossed the North Sea and headed over
mainland Europe. The greatest fear was from flak and Intelligence
estimated that the loss of gliders and transport craft could be up
to 40%. As it was, very few of the 1,545 aircraft and 478 gliders
were lost.
The 82nd Division landed
without major problems around Grave and Nijmegan. The 101st Division
was equally successful and by nightfall, the Americans and British
armoured corps had met up in Eindhoven.
However, by the 18th
September, fog had played its part. The glider and tug flights that
were due to cross on the second day could not do so. This affected
the 82nd Division in that Gavin had fewer men to attack the bridges
at Waal - especially the road bridge that had held out for three
days during the German attack on Holland in 1940. This bridge only
fell in the evening of Wednesday 20th after a combined
American/British attack. With this bridge captured, the 30th Corps
armour could race to Arnhem to relieve Urquhart's First Airborne
Division there.
At Arnhem, the British met
much stiffer opposition than they had been lead to believe. The IX
and X SS Panzer Divisions had re-grouped at Arnhem - as Dutch
resistance had warned. Both groups comprised of 8,500 men lead by
General Willi Bittich. These were not the poorly equipped German
troops low in morale that British Intelligence had claimed were
stationed at Arnhem. Bittich - a highly regarded general in the
Waffen SS - sent the IX SS Devision to the British landing zones
immediately. The X Division was ordered to Nijmegen to stop the 2nd
Army group advancing on Arnhem. Bittich was confident of success:
The men from the IX Division
quickly created a formidable defensive line to stop the British
advancing to Arnhem. The British faced a number of serious problems
in the landing zone. Nearly all the vehicles used by the Airborne
Reconnaissance Squadron were lost when the gliderscarrying them
failed to land. Therefore the advance into Arnhem itself was delayed
but also had to be done almost entirely on foot. The job of the
Reconnaissance Squadron was to move off in jeeps etc. in advance and
secure bridges and roads. This they could not do after the loss of
their vehicles. The maps issued to officers also proved to be less
than accurate.
The British paratroopers
came under German fire. Only the 2nd Battalion lead by Lt. Col.
Frost moved forward with relative ease but even they were
occasionally halted by German fire. Frost's men were the most
southerly of the British units and the Germans had covered their
route to Arnhem less well than the other routes the British were to
use. When Frost got to the bridge at Arnhem, he only had about 500
men. He secured the northern end of the bridge and the buildings
around it but he remained heavily exposed to a German attack across
the bridge as the British had failed to secure the southern end of
the bridge. Around Arnhem, British troops, engaged in combat with
the SS, took heavy casualties. By now, the Germans were being
reinforced with Tiger tanks.
Despite being short of
ammunition and with no food or water, Frost's men continued
fighting. A German who fought in the final battle for the bridge
wrote:
The 2nd Army failed to reach
Arnhem. In the final drive - just 10 miles - from where the 2nd Army
was to Arnhem, the SS fought with great skill seriously delaying the
forward momentum that the 2nd Army had previously developed. Those
British troops who remained in the Arnhem area were caught in land
that the SS called 'The Cauldron'. A decision was made to withdraw.
Those soldiers that could be evacuated were but many wounded were
left behind. In all, over 1,200 British soldiers had been killed and
nearly 3,000 had been taken prisoner. 3,400 German troops had been
killed or wounded in the battle.
Why did the plan fail?
The speed with which Bittich
organised his men and his tactical awareness were major reasons for
the Germans victory. However, British Intelligence had ignored Dutch
Resistance reports that the SS were in the region. When the men
landed they found that their maps were inaccurate regarding the
layout of the roads in the Arnhem area. Another major problem was
that the radios issued to the men only had a range of 3 miles and
they proved to be useless when the various segments of the British
army in the area were spread over 8 miles. Such a lack of
communication proved a major handicap to the commanders on the
ground who rarely knew what other commanders were doing or planning.
The landing was also planned to be spread over three days so the
Airborne Division was never up to full strength.
The fierce
battle on the ground was matched by the battle in the air and a huge
number of aircraft were destroyed on both sides in a relatively
small area and time frame. The main combat aircraft taking part in the is Battle on
the Allied side were Typhoons, Spitfires, Stirling's which were
tasked with dropping supplies, C 47 Dakota and gliders. From eye
witness reports it seems that Spitfire's some carrying bombs and
Typhoons were the most numerous in the Arnhem bridge area
On the
German side the FW 190, BF 109, Me 110 appear to be the main
aircraft used and these account for most of the Luftwaffe crash sites in
the area.
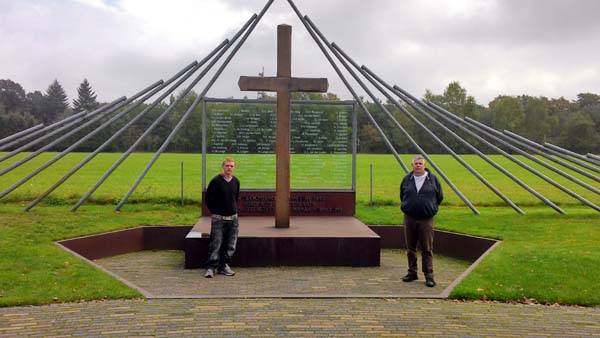
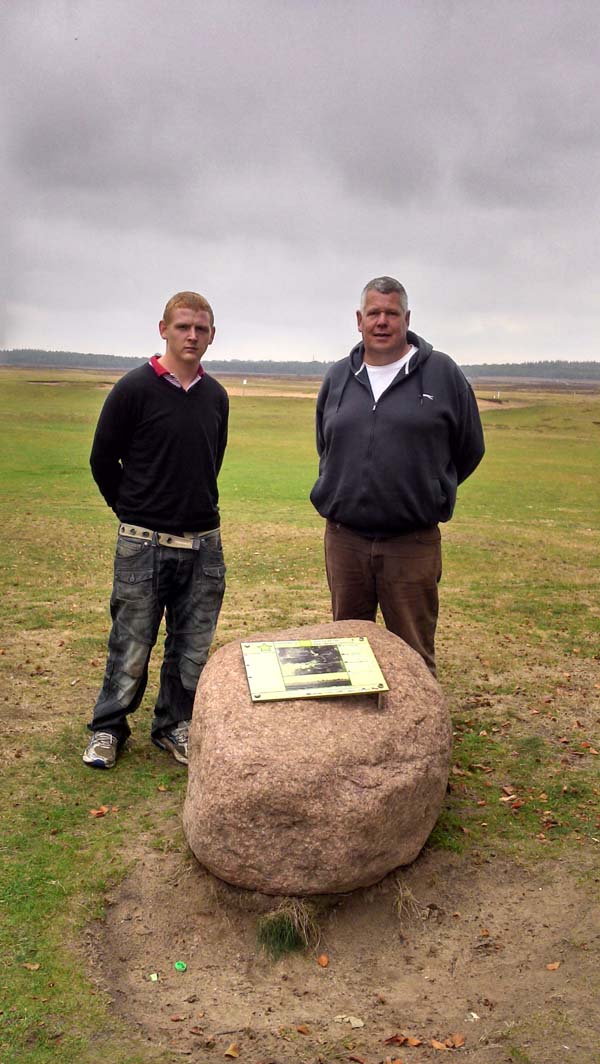
During our visit we came
across this memorial close to Arnhem. Dutch resistance to the German
occupation was very well organised and effective, how ever retribution
was brutal and swift. This memorial marks the spot where over 100
random innocent civilians were executed as a reprisal after a German
general was machined gunned and killed by resistance fighters. There
are many sights like this in Holland and many more people were
murdered by the SS in retribution for this and many other acts of
resistance.
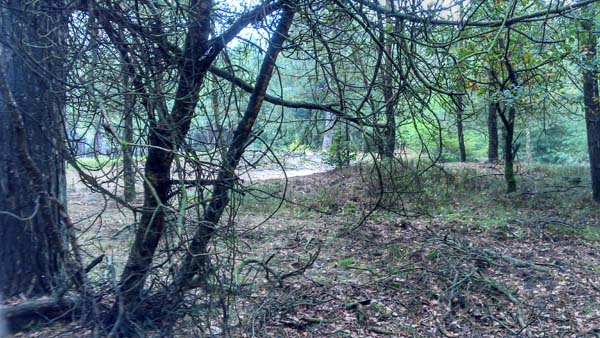
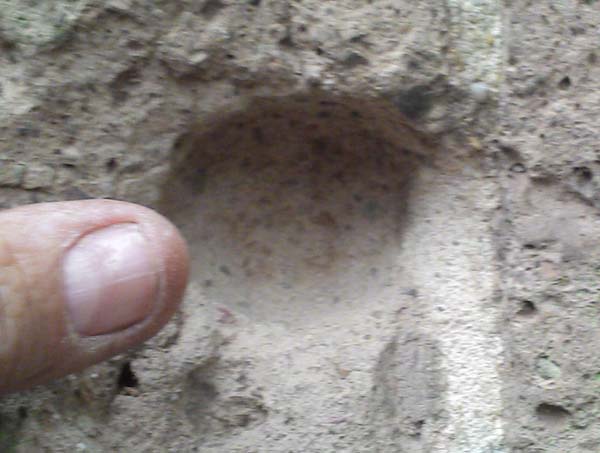
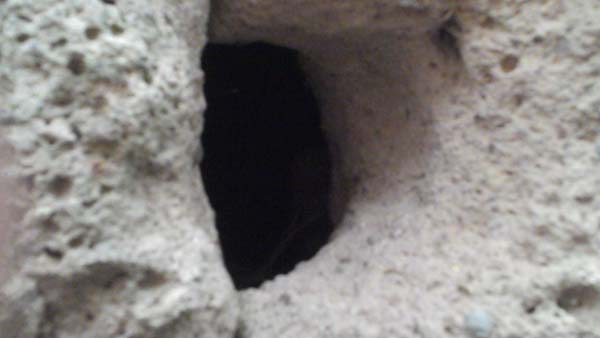
This is the site of a
Lancaster crash near Arnhem the light coloured sand in the middle of
the picture has remained clear as oil and fuel from the crash
prevent growth. The aircraft on its way back from a raid on Berlin
was shot down with all the crew killed. The aircraft was totally
destroyed and all that remains are tiny fragments.
Link to
details of this lancaster
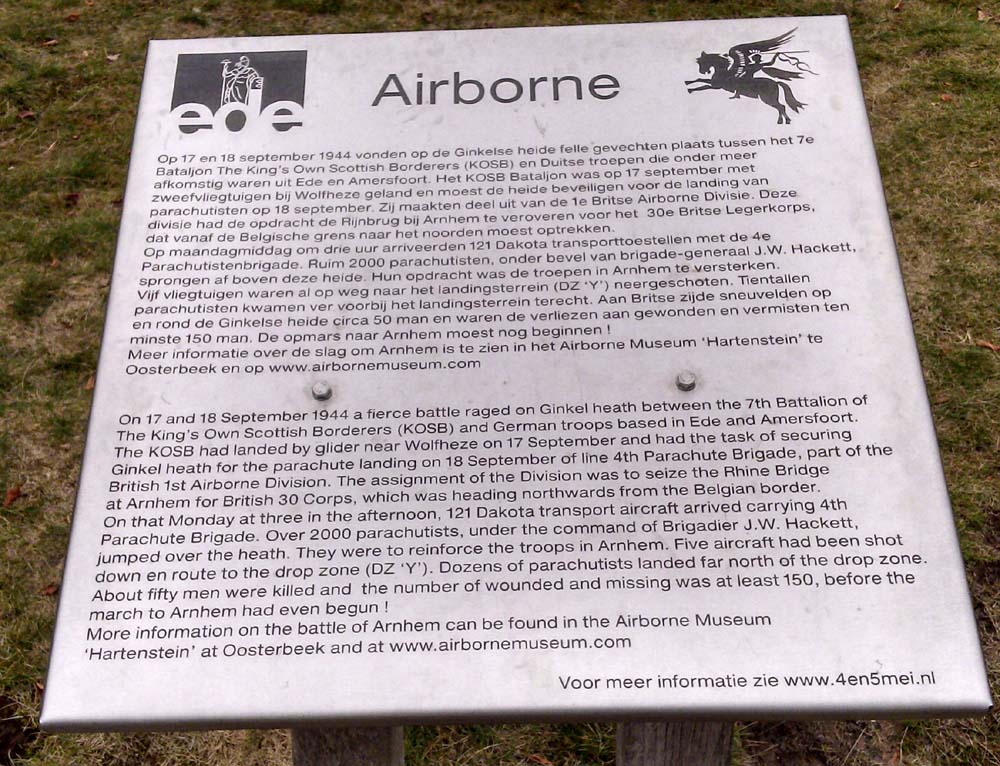
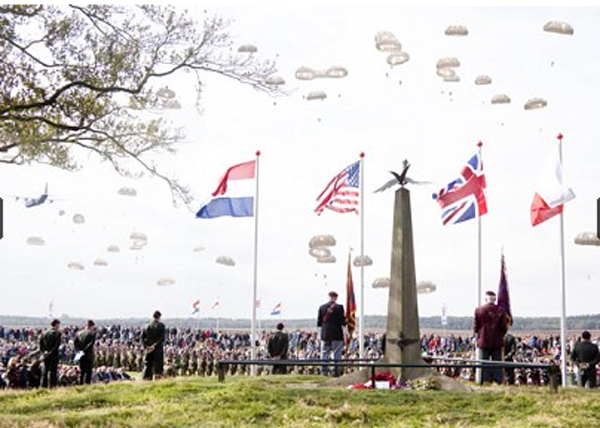
This is a memorial placed in
the area of one of the landing sites used by the British to drop
their troops in the Battle of Arnhem there was a fierce battle here
with many troops being machined gunned by a German defensive line
before reaching the ground. From here the troops attempted to reach
Arnhem through heavily defended territory which included Tiger tanks
and fanatical SS units.
Click on the
picture under to enlarge it.

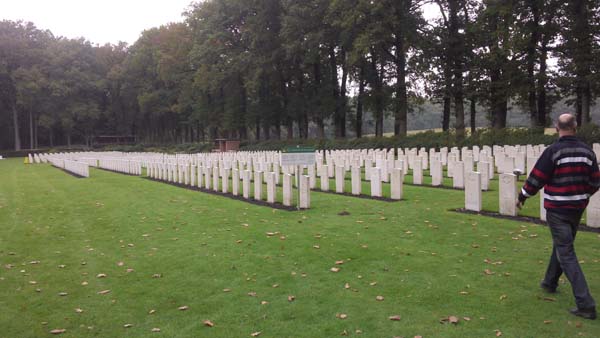
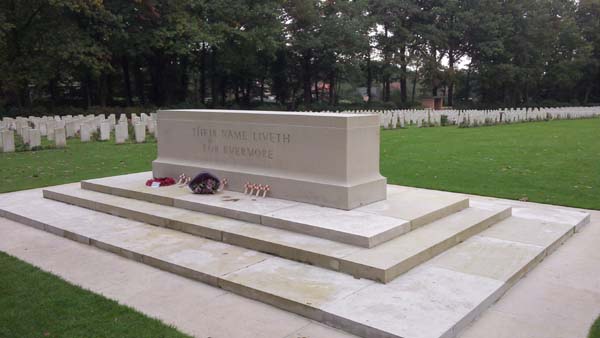
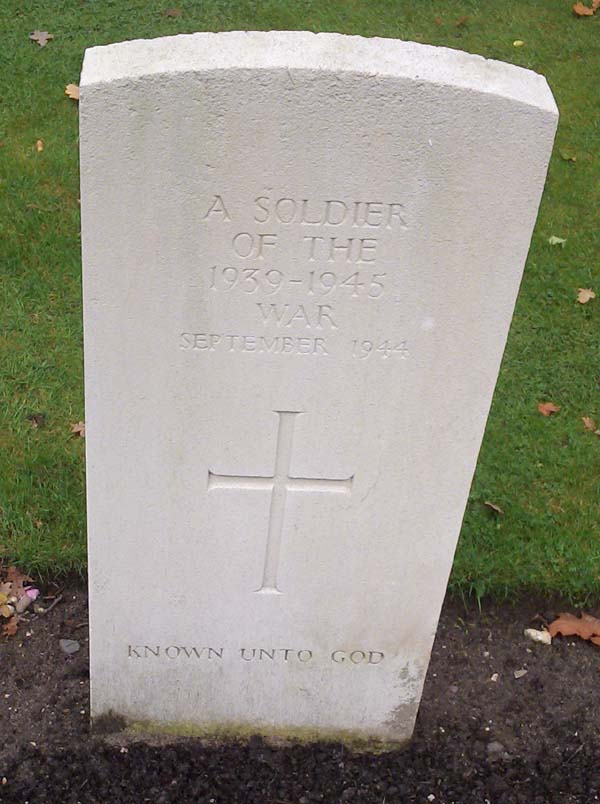
This is the cemetery for
British, Canadian and Polish troops killed in the Battle of Arnhem.
These casualties were suffered in a relatively short period of time.
Its a very sobering place to visit and will bring a lump to the
throat These brave soldiers all gave their lives for the freedom we
all enjoy today. Many of the graves are of unknown soldiers and many
still lie undiscovered in the surrounding countryside.
This picture was taken
opposite the British command centre, to the left were the British
and to the right were the Germans and a deadly and fierce fight took
place in this area. The monument is of a British paratrooper with a
young Dutch girl.
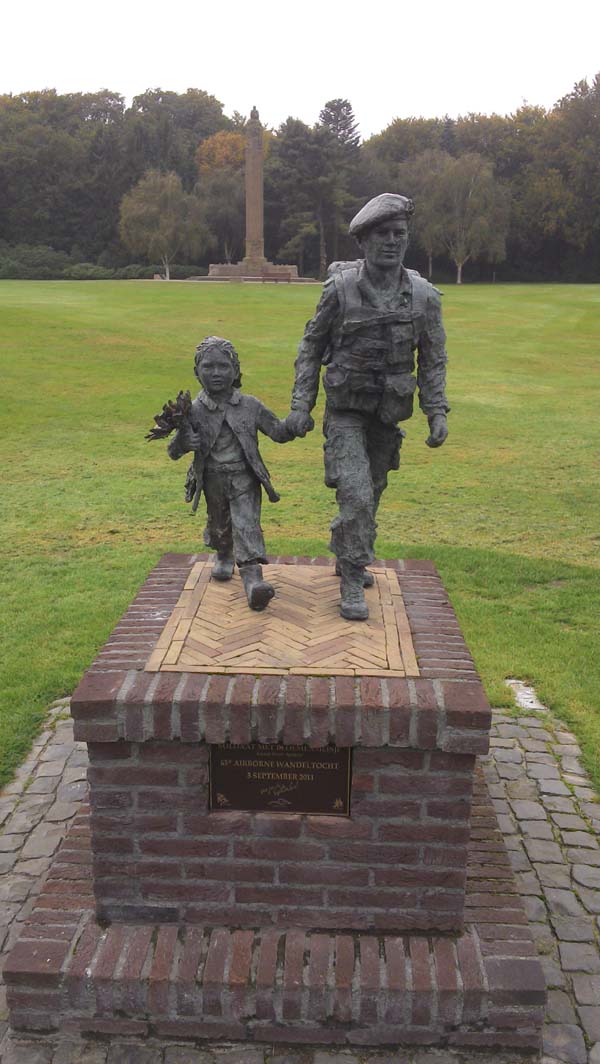
The Dutch people especially those who live in
the Arnhem area have a great respect for the troops that attempted
to free them and movingly remember their sacrifice.
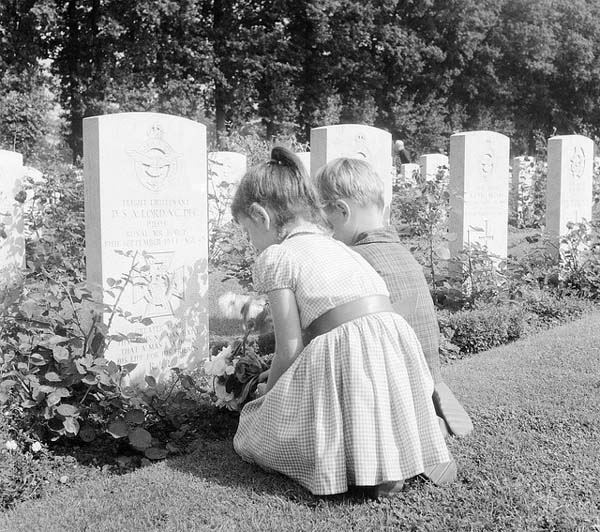
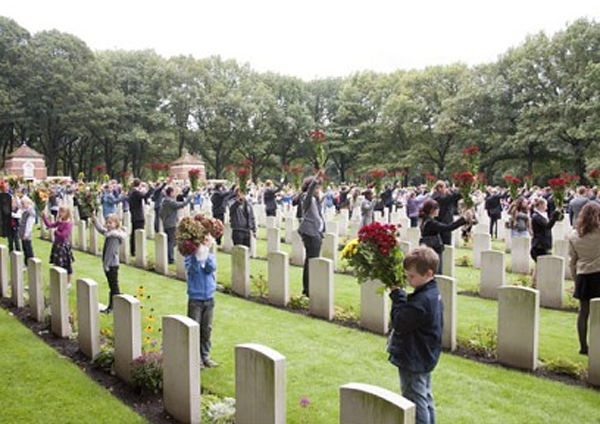
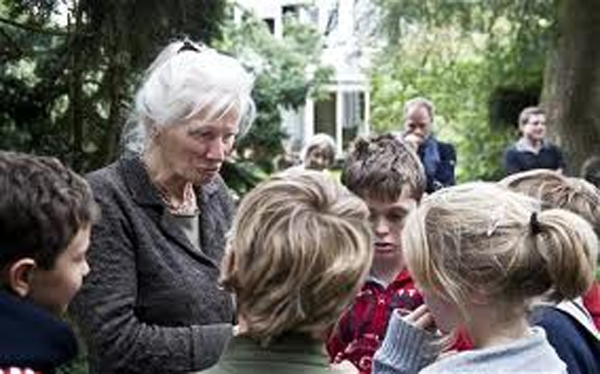
Every year on the anniversary of the Battle
Dutch school children carry a flower and place it on every grave in
the cemetery.
This picture is of the
British headquarters and command centre today it houses a museum its
to the right of the picture above. The surrounding trees are full of
battle scars.
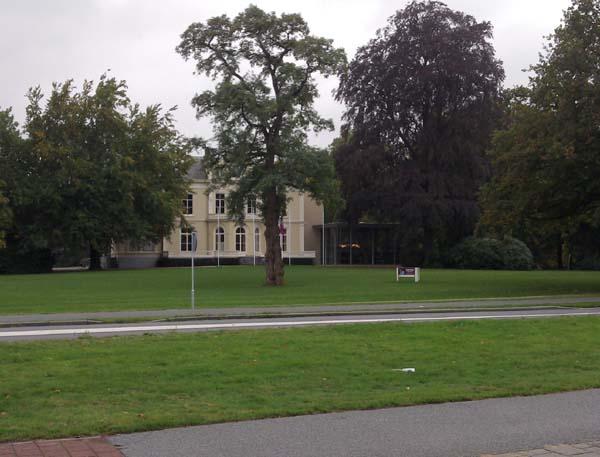
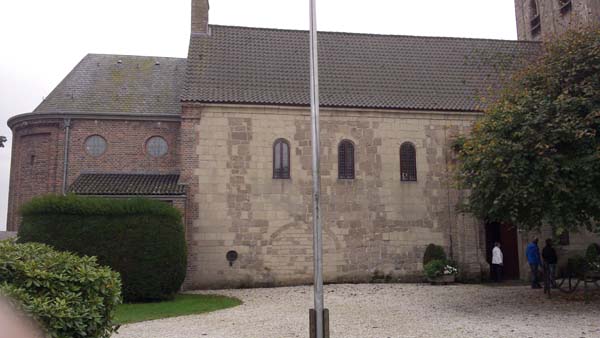
The following pictures are
of the church and adjacent house used by the British wounded. The
church is battle scared with thousands of bullet, cannon and mortar
shell hits.
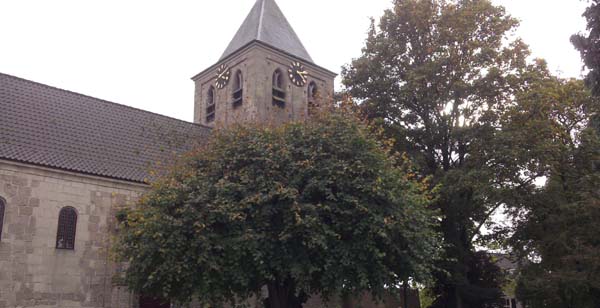
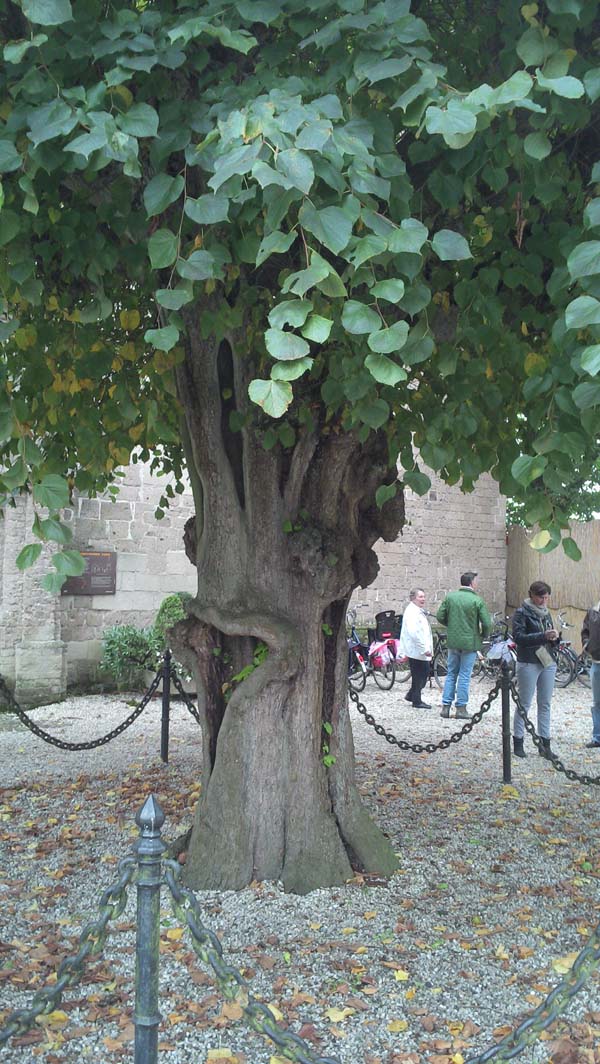
The tree outside the church is deformed from
the hits it received during the battle.
Battle damage to the church is still clearly
seen today.
The
Angel of Arnhem
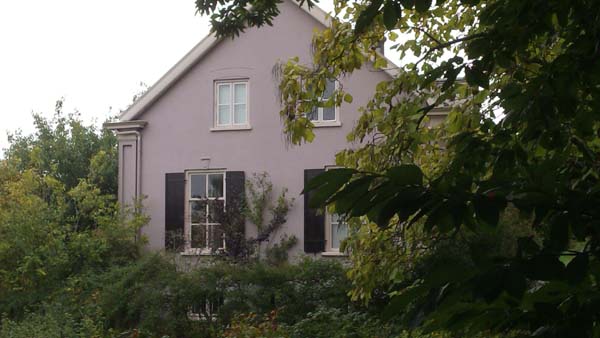
Dutch civilian Kate ter
Horst agreed that her home, the �Old Vicarage,� shown above next to
the Oosterbeek Church could be used as a Regimental Aid Post during
the height of the fighting. She had five young children sheltering
in the cellar yet insisted on tending to the wounded. �The Angel of
Arnhem� as she was known to the wounded airborne soldiers negotiated
their evacuation with the Germans when the Aid Post came under
constant fire. After the battle the Germans turned her out with her
children alongside the rest of the inhabitants.
Kate ter
Horst
About 450 Dutch civilians were killed and many more injured as a
consequence of the MARKET-GARDEN Operation.
When fighting ceased there were still about 400 airborne soldiers
and airmen hiding in the woods and houses around Arnhem, Ede and
Apeldoorn. They were housed and sheltered by Dutch civilians and
assisted later to escape over the river by the Resistance. This was
a spontaneous rather than ordered effort and they risked certain
death and retribution for their families if discovered.
The civilian inhabitants of Arnhem and Oosterbeek were forcibly
evacuated, both as a reprisal and to clear the new front line. Empty
houses were systematically looted by the Germans and the cleared
furniture and household effects sent to bombed-out civilians in the
Ruhr. It is assessed 30,000 Dutch civilians perished in the
subsequent �Hunger Winter� from starvation, disease, the cold and
military action.
A close affinity has since remained between Airborne Forces and the
Dutch people of Arnhem, Oosterbeek and the Gelderland and endures to
this day, a consequence of the shattered expectation of an early end
to the war and the tragedy that ensued. One surviving Dutch
Resistance member, a doctor, felt despite the carnage and
destruction the airborne soldiers felt they inflicted on the area:
�Don�t ever say that it was a wasted effort; you gave us hope; you
showed that someone cared, and that we were not forgotten�.
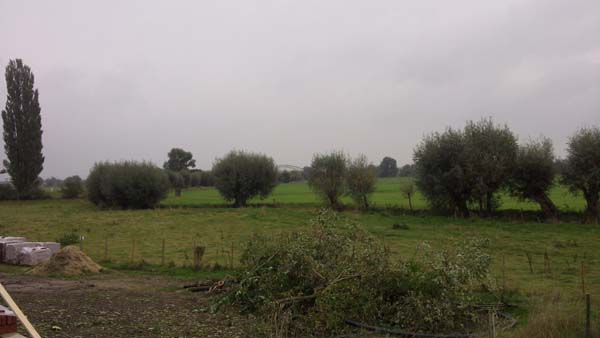
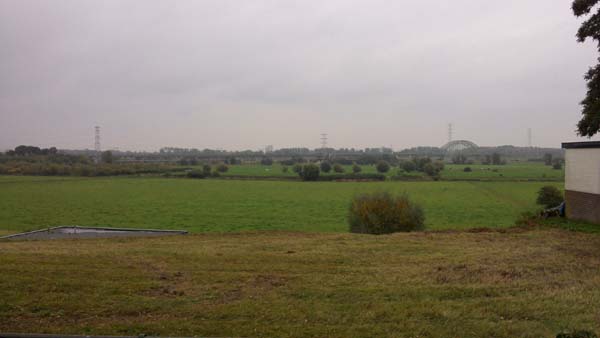
This is the view from the
rear of the Church and to the left is the house pictured above. In
the centre you can just make out the railway bridge at Arnhem.
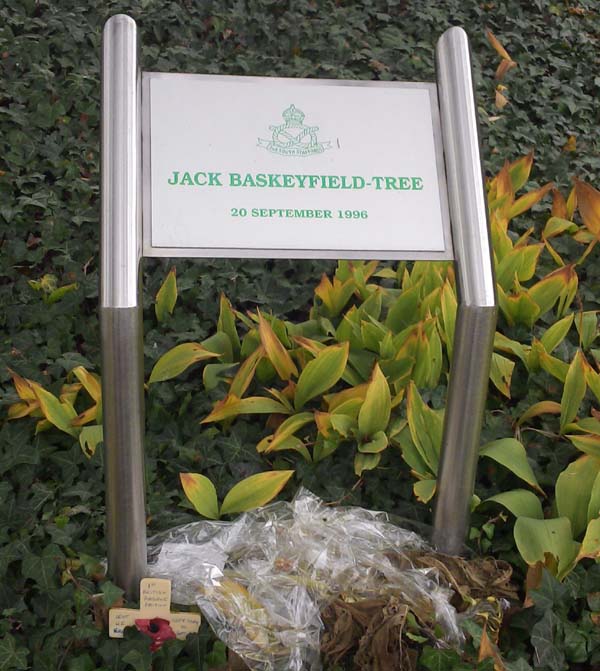
No.
5057916 Lance-Sergeant John Daniel Baskeyfield, The South
Staffordshire- Regiment (1st Airborne Division) (Stoke-on-Trent). VC
The
following pictures were taken at Acacialaan Arhem, it is the
site of an event which won John Daniel Baskeyfield the
Victoria cross.
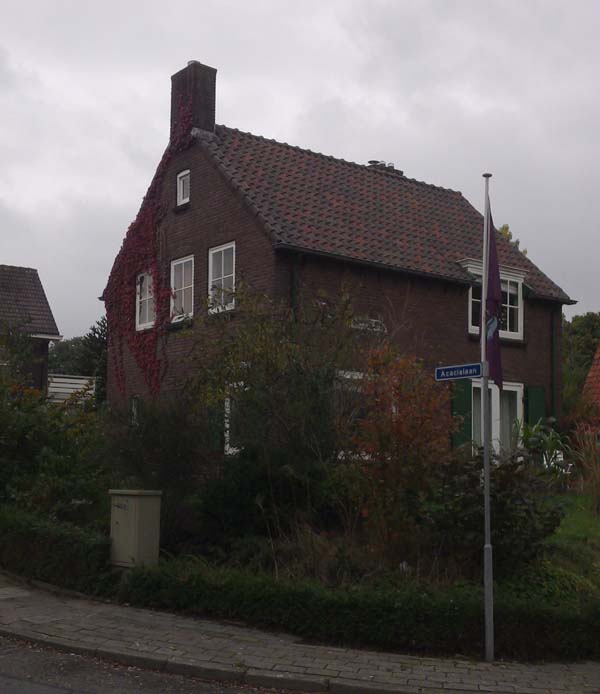
Acacialaan
Arnhem as it is today

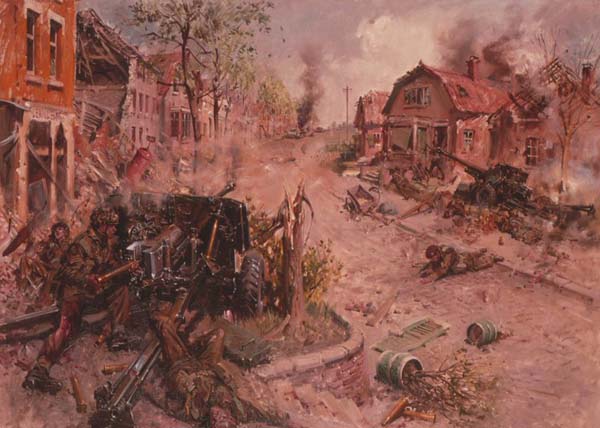
Under an artists impression of
the fight
in Acacialaan Arnhem
In the early hours of the morning of 19 September, an attack was
launched on a narrow front between the river and the railway line,
in order to force a passage through to the bridge. Most of the
support weapons were left in the rear, as they were unable to
suitably deploy in the dark and in the narrow confines of the urban
surroundings. However, in the face of strong enemy positions and
armour, the attack faltered and the British routed.
The remnants of
the four battalions fell back in disarray to the main
divisional positions at Oosterbeek. Here they were
gathered into defensive units by Lieutenant Colonel
Sherriff Thompson, CC/O of the 1st Airlanding
Light Artillery Regiment, who forcibly stopped many of
the panicked troops and had Major Robert Cairn form them
into a defensive screen half a mile in front of his own
75mm howitzers positions. The sector was designated
"Thompson Force", but Thompson actually sent Major
Richard Longsdale forward to take command of these
outlying troops later in the day.
The German
forces made determined attacks against Lonsdale's force
on 20 September, starting soon after dawn. Baskeyfield
was in charge of two 6 pounder anti tank gun defending a
T junction on the Benedendorpsweg, the
southernmost road between Arnhem and Oosterbeek.[
Baskeyfield's guns faced up the Acacialaan, which
joined the Benedendorpsweg from the north, and
covered the likely enemy approach along this road and
from open ground to the north east. His right flank � to
the east � was covered by another anti tank gun
commanded by Lance Sergeant Mansell.
In an initial
German assault, Baskeyfield and his gun crews destroyed
two tanks and a self-propelled gun as they advanced down
the Acacialaan. Baskeyfield allowed the armour to
come within 100 yards of his positions before ordering
his crews to fire, while paratroopers of the 11th
Battalion in nearby houses dealt with attacking infantry.
In the course of this action, Baskeyfield's crew was
killed or wounded and Baskeyfield himself was badly
injured. However he refused to be evacuated and in a
later German attack he worked his gun alone, loading,
laying and firing it himself. He fired round after round
until enemy fire put his gun out of action, and crawled
to the second gun, whose crew had similarly been
disabled. From here he engaged another self-propelled
gun, dispatching it with two rounds, but was killed
shortly afterwards by fire from another German tank.
Lonsdale's men
fell back to new positions later that day and "Thompson
Force" was eventually renamed "Lonsdale Force" when
Thompson was wounded on 21 September. The force
continued to hold the Oosterbeek perimeter until the
Allies withdrew in Operation Berlin on the night of 25
September.
The KING has been graciously pleased
to approve the posthumous award of
the VICTORIA CROSS to: �
No. 5057916 Lance-Sergeant John
Daniel Baskeyfield, The South
Staffordshire- Regiment (1st
Airborne Division) (Stoke-on-Trent).
What follows is the citation for
Lance-Sergeant John Daniel Baskeyfield
Victoria cross.
On 20th
September, 1944, during the battle
of Arnhem, Lance-Sergeant
Baskeyfield was the N.C.O. in charge
of a 6-pounder anti-tank gun at
Oosterbeek. The enemy developed a
major attack on this sector with
infantry, tanks and self-propelled
guns with the obvious intent to
break into and overrun the Battalion
position. During the early stage of
the action the crew commanded by
this N.C.O. was responsible for the
destruction of two Tiger tanks and
at least one self propelled gun,
thanks to the coolness and daring of
this N.C.O., who, with complete
disregard for his own safety,
allowed each tank to come well
within 100 yards of his gun before
opening fire.
In the course of
this preliminary engagement
Lance-Sergeant Baskeyfield was badly
wounded in the leg and the remainder
of his crew were either killed or
badly wounded. During the brief
respite after this engagement
Lance-Sergeant Baskeyfield refused
to be carried to the Regimental Aid
Post and spent his time attending to
his gun and shouting encouragement
to his comrades in neighbouring
trenches.
After a short
interval the enemy renewed the
attack with even greater ferocity
than before, under cover of intense
mortar and shell fire. Manning his
gun quite alone Lance-Sergeant
Baskeyfield continued to fire round
after round at the enemy until his
gun was put out of action. By this
time his activity was the main
factor in keeping the enemy tanks at
bay. The fact that the surviving men
in his vicinity were held together
and kept in action was undoubtedly
due to his magnificent example and
outstanding courage. Time after time
enemy attacks were launched and
driven off. Finally, when his gun
was knocked out, Lance Sergeant
Baskeyfield crawled under intense
enemy fire to another 6-pounder gun
nearby, the crew of which had been
killed, and proceeded to man it
single-handed. With this gun he
engaged an enemy self propelled gun
which was approaching to attack.
Another soldier crawled across the
open ground to assist him but was
killed almost at once.
Lance-Sergeant Baskeyfield succeeded
in firing two rounds at the self
propelled gun, scoring one direct
hit which rendered it ineffective.
Whilst preparing to fire a third
shot, however, he was killed by a
shell from a supporting enemy tank.
The superb
gallantry of this N.C.O. is beyond
praise. During the remaining days at
Arnhem stories of his valour were a
constant inspiration to all ranks.
He spurned danger, ignored pain and,
by his supreme fighting spirit,
infected all who witnessed his
conduct with the same aggressiveness
and dogged devotion to duty which
characterised his actions
throughout.
The Chair from
Acacialaan
As stated
previously the entire civilian population of Arnhem was
forcibly evacuated and all their belongings looted. One
resident who returned to their house after the
liberation in
Acacialaan discovered the only
remaining thing in the house a wooden chair stamped with
the German eagle. They had this chair in their
possession from that day until it was purchased by
Spitfire Spares.
Link to chair
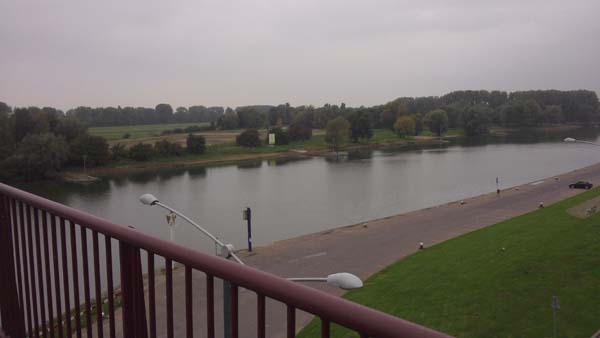
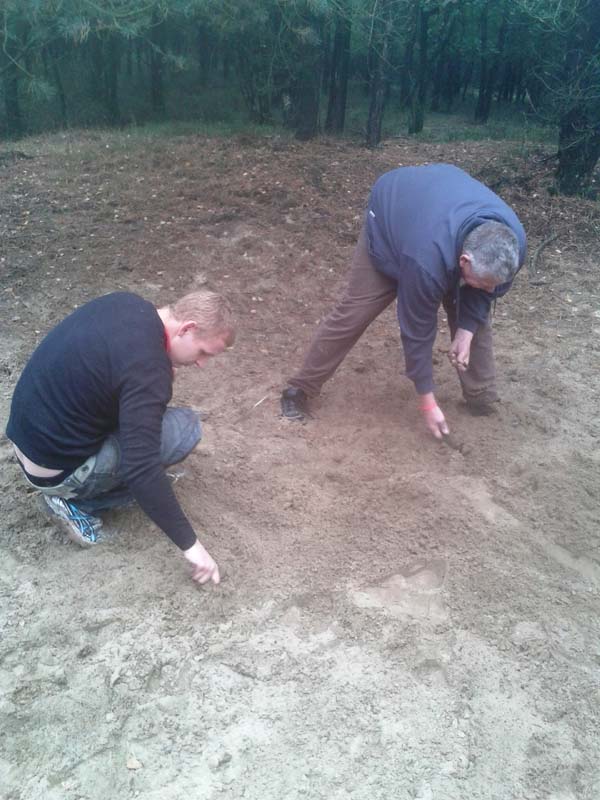
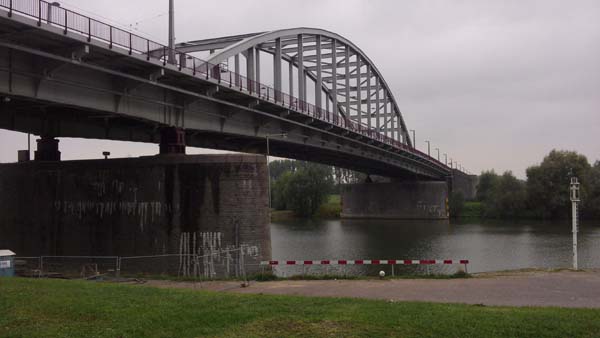
This picture
shows Arhem bridge in the distance, this and the
surrounding area is the site were many artefacts we have
purchased were recovered by aviation archaeologists.
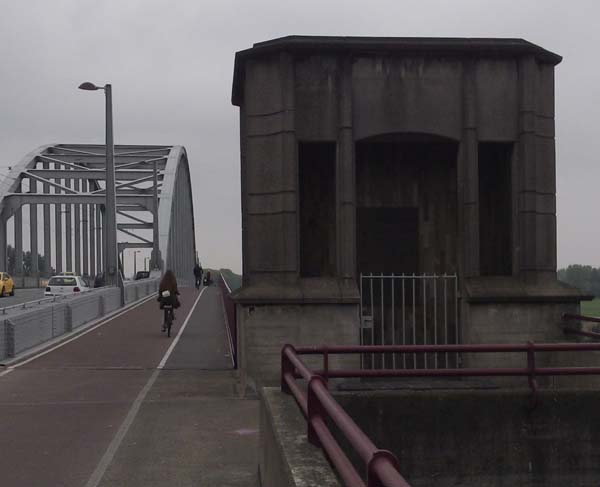
The bridge as it looks to
day it still bears the scars of the battle and has many bullet and
shell holes.
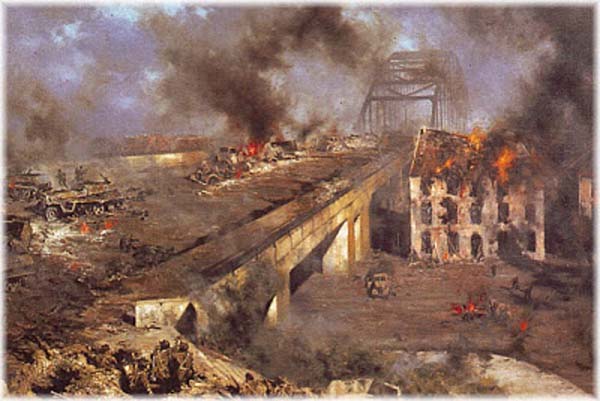
An impresion of the bridge
to far during the Battle of Arnhem.
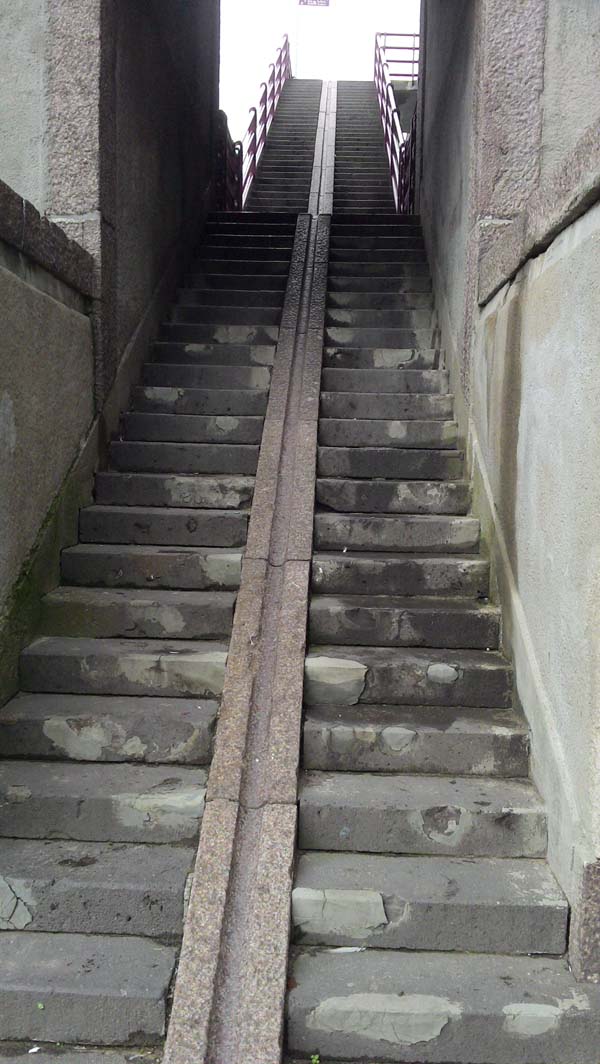
Stairs leading up to the
bridge on the Arnhem side of the river British troops had to haul
all their weapons and equipment to the top of these stairs including
the only heavy weapon they had the 6 pounder gun. Again there are
many repairs where battle damage was inflicted.